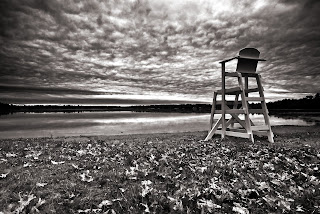
Anyway, here's the deal, the tutorial is basically the shadow/highlight tool on steriods. A good candidate would be any image that has any critical highlight detail that can't be recovered with the simple use of the Shadow/Highlight tool or luminosity blends.
The first step is to duplicate the background layer twice, then turn off the opacity of the top layer. Then go to the channels panel and find the channel with the most shadow/highlight detail.
The next step is to go to the "Apply Image" command under the Image menu. You will then apply the channel with the most highlight detail to that new middle layer. Here's the trick though, click the "invert" check box.
Then you go to the blending mode of the new layer and change it to "Overlay." (In a nutshell, overlay makes lighter things lighter and darker things darker.)
Don't be disturbed by your funny looking image at this point. The next step is to apply a Gaussian blur to the image. (Amount will vary based on the size of the file, bigger files will need a larger blur amount). Now you should see some of the highlight detail begin to pop. The final step is to turn on the top layer and change its mode to "Darken" - meaning the changes will only be applied to the highlights, not the shadows.
Finally, vary the opacity of the new layers to taste (100% usually takes things a little too far).
Here's a quick before and after with this technique (look at the sky highlights). You may have to click on them and view them large to see the effect:
Before:

After:


0 comments:
Post a Comment